
Amitha's Blog
6 Simple Steps to a Super Organized Pantry
I have a confession to make.
For years, as soon as someone would enter my kitchen, I would inwardly cringe. I felt as though they’d suddenly discovered the truth about me and my family.
A shameful secret that had been staring me in the face, day in and day out, year after year.
Don’t get me wrong. I adore my house. It’s calming and cozy. It’s truly one of my favorite places to be in the whole world!
I remember when we had just moved back in after renovating. We had painstakingly worked to get the furniture moved in, make sure all the art was hung in all the right places and made over a few pieces to make them fit.
I was finally able to start hosting and enjoying my home!
The problem is, I still wasn’t 100% happy.
Hubby and I started fighting all the time about this one issue that seemed to be creeping up everywhere.
His deep, dark secret – he loves STUFF!!
Any kind of stuff. Piles of stuff. Stuff everywhere.
I hit a point when I just couldn’t take it anymore.
I stopped everything and decided to focus on figuring out how to make this work.
Instead of looking at more fabrics, more paint, more wallpaper – all of the things that are still pending on my list to do – I switched gears.
I decided to face my biggest fear head on – jump straight into cold water.
Honestly? I really wanted to throw it ALL away.
I love him though, so that wasn’t really an option. Instead, I had to COMPROMISE.
(*Sigh* isn’t it hard when you have to follow your own rules?!?)
I decided to start in an area that I consider mainly my domain: the kitchen. Specifically, I decided to tackle the pantry.
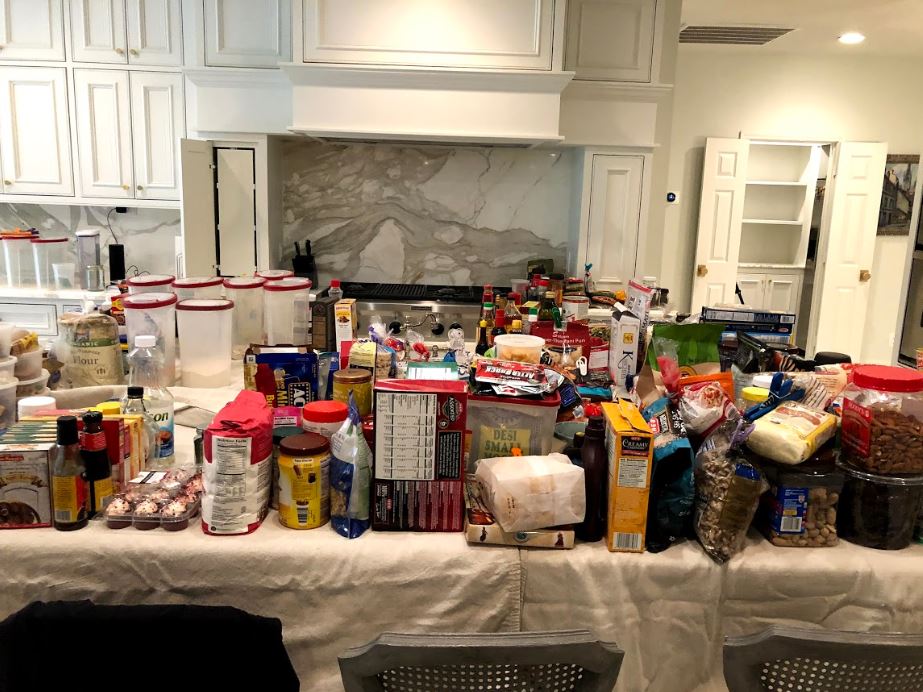
Back then, when you’d open our pantry, food would fall out everywhere. It was stacked high and deep and then some more on each, and every shelf.
If you’ve ever drooled over those amazing pantry photos on Pinterest and Instagram and wondered how you can get the same results, you’re going to want to keep reading.
Here’s what I did in my own pantry, step by step. (Even if you aren’t ready to do this, read this, watch the video and save it for later.)
Let’s jump in!
Step 1 – Pull it ALL out.
Yup. Every single thing.
My mom used to do this when we were kiddos and it drove my brother, sister and I insane. Mom would take all of our toys, books, stuffed animals and put them in the middle of our room and tell us to sort it out and clean it up!
You know what? She was right. (Again.)
In fact, I can tell you from rearranging furniture at the shop, it’s often easier to start fresh then try to scoot a few things around here and there.
So that’s exactly what I did.
Step 2 – Check all expiration dates.
Hubby thought this was foolish. “There’s no out-of-date food in there,” he said.
But there was, and quite a bit of it, too.
I’d hate for you to reorganize rotten food, so do this next.
You’ll be surprised at how much is in there, especially if your pantry is overfull like mine was!
Step 3 Don’t quit.
You’re going to start feeling overwhelmed here, and this is when you will want to quit.
I know. When I reached this step, I found myself slumped over my counter wondering what I’d gotten myself into. This project was tough!

The good thing about it ALL being out, though, is that you can’t turn back now. There is literally no turning back.
So what next?
Step 4 – Group and conquer.
I know you may think I’ve gotten the phrase backwards but this is exactly what I mean.
Dayven was doing his 4th grade math worksheet the other day and was feeling very overwhelmed. You see, the worksheet had addition and subtraction problems all scattered and mixed into the same sheet. He wanted to give up. I told him to go line by line, problem by problem, step-by-step and not give up.
Well clever cat that he is, he decided to do all of the additions at once, and then go back and do all of the subtraction problems at once. He finished the whole worksheet in less than 10 minutes, which I had estimated would take him an hour.
When I asked him how he decided to do this, he said it came into his brain – “group and conquer.”
So that’s your next step.
Start grouping like things together.
Here is a great starting list for you:
- Cereals
- Snacks
- Nuts
- Chips
- Baking
- Cooking
- Oil
- Water
- Wine
- Sport Drinks
- Kids Drinks
- Sweets
- Cookies
Do you get the idea?
Once you do this, you’re going to start containing these together.
Step 5 – Contain and organize.
The next step is to figure out which containers you need in your pantry.
Do not drive over to the container store first to figure this out. Nope. Don’t do it.
First, measure your shelves, especially how deep they are.
That will eliminate a ton of choices.
Next, see how wide they are, so you can see how many containers can possibly go across.
Once you’ve got that in place, I would go online to see the choices of which styles you prefer.
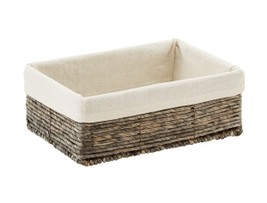
Here you can see my cabinet color, so I opted to start with these gray, linen lined baskets.

One of my goals was to be organized, but the other was to have a pretty pantry. I also wanted to see less “stuff” and have more consistency – so this helped me quite a bit.
I took cues from my existing cabinet colors and let that guide me.
These are also great options:

Another must-have for me were these lazy Susans to store all of my sauces, condiments and other cooking ingredients.

I also opted for some larger baskets like these to place down below – perfect for holding groups of snacks.

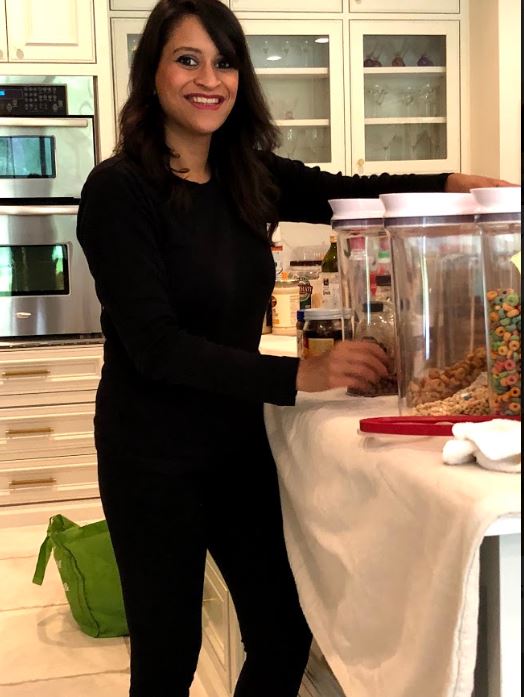
The third style of container I absolutely love are the ones I use for cereals and grains.
Here’s why I love these, and you will too.
For one, you can see all the gorgeous grains and food inside.
Second and most importantly, a critical part of your pantry makeover: You can get rid of all the mismatched, super colorful boxes that are designed to grab your attention in a grocery store – not give you peace and calm!
This is a must-do step throughout this process.
Here are the categories I started with removing the packaging:
- Cereal boxes
- Rice
- Lentils
- Pasta
- Flour
Step 6 – Snack Zone
Last not but not least, I thought about and planned out a snack zone for Rohan, Davyen and hubby too. All of them love snacks, and would tear up the pantry looking for something. Seriously, when our friends come over they joke the pantry is Bobby’s world and we’re living in it!
Here’s what I did for Bobby’s zones:

If you are ever building or remodeling your pantry, one thing I strongly recommend is adding drawers. This is a great way to stay organized and kids love it. (I’ll share a few more tips with you about this in a few weeks.)
Next I added these dividers into our drawers.
I took all of the snack boxes and removed the food, snacks and individually wrapped items like:
- Granola bars
- Fiber cookies (yes we are old and love our fiber)
- Protein bars
- Raisins
- Popcorn
- Individual chip packets
- Gold Fish
You get the idea.
Then, I started laying them out in between the partitions.
Now whenever anyone opens a drawer, it’s like the angels are singing!
Our boys, and all of their friends absolutely love it. They can find what they want, and the best part the pantry stays tidy and organized!
Here are some the great benefits I have experienced from doing this project:
- Everyone follows the same system of putting the food away – yay! No more shouting or micromanaging (sorry y’all, just keeping it real).
- Hubby and I can quickly see what we are short on when we prepare our grocery list (great habit) like when the snack drawer is half empty, or the cereal bins are low.
- We do not overbuy food – which we used to do all of the time! The baskets and bins help us visualize how much space we really have for groceries and extra food.
- It’s helped us be more mindful about how much food we actually consume.
- It’s given us a sense of calm and order.
Best of all, I don’t get mad or frustrated when hubby and kids leave the pantry light on and doors open. Now, it’s relaxing and friends and family often want to go see what that’s all about.
If this project seems too big or overwhelming for you, don’t sweat it. You can easily do just 1 or 2 of these steps and end up with an impressive pantry makeover.
Here’s where I suggest you start.
Step 1: Get you a set of the cereal boxes – easy enough, you know how many types of cereal you like.
Step 2: Get yourself the grain boxes – you can do this, it’s not hard. No measuring required.
That’s it.
When you are ready to move to the next step, you can start from the top.
I so hope you enjoyed this article this week. I am so happy I did this project and I have been waiting for the right time to share it with you – it’s the perfect spring refresh your home needs.
Leave a comment and let us know what you are going to do!
And remember – sharing is caring, so be sure to spread the word and help your family and friends by tagging or sharing this post on social media!
With love,
Amitha


Secret Tool Revealed
High-priced interior decorators desperately want this hidden: YOU can transform your home into a gorgeous dwelling—all by yourself—and save thousands. All you need is a few dollars’ worth of material. Access this amazing secret RIGHT NOW, and revitalize your home...in just a few hours.