Amitha's Blog
Farmhouse Christmas Tree | How To Style A Designer Tree | Amitha Verma
Christmas is just around the corner, and I thought we could kick-off this season’s farmhouse styling tips by setting up the quintessential Christmas decoration — the Christmas tree.
By the end of this blog post, I hope you get some new Christmas tree ideas to inspire you to decorate.
I’ll teach you how to use decorative ribbon in your tree, how to choose and style statement ornaments, and other nifty tricks to take your stunning Christmas tree up a notch this year.
Let’s jump right into it!
What Is The Best Color Scheme For My Christmas Tree?
Every year, customers ask me, “what colors should my tree be?”
If you’re looking to take a break from the traditional green-and-red theme to create your own stylized Christmas tree that would make interior design magazines envious, I recommend matching your tree decor to the color schemes existing in your home.
There is something so wonderfully stylish and chic about a tree that matches the home’s overall aesthetic. The holidays are such a perfect time to have fun and be playful with your home decor, so for me, that means adding a little more glitter and glam to the farmhouse aesthetic.
The great thing about holiday decor is you can easily change up the color scheme without changing the foundation. The only thing you really need to change is your ribbon.
General Tips For Setting Up Your Christmas Tree
Where To Place The Tree
Choosing the best spot to place your Christmas tree will be different in every home. One of my favorite tree placements is by large bay windows in the family room.
From the outside looking in, a beautifully decorated Christmas tree is cheerful, inviting, and charming.
On the inside, the natural light through the windows can really help bring out the sparkle in the decorations on the tree.
Of course, make sure to keep your tree a good distance away from direct heat sources such as a heater or fireplace for safety.
You may also want to consider how small children or pets might interact with the tree, so keeping the tree out of heavy foot traffic areas is a good idea to avoid any accidental bumps.
How Do You Make A Christmas Tree Look Bigger?
Fluff Up Your Tree

Once you’ve decided on the perfect spot for your tree, and you begin to set it up, you may notice several bald spots where the branches look a bit sparse or empty.
If you’re working with an artificial tree, you can go through the different sections — starting from the bottom up —and open up the wire branches to fluff up your tree to your liking.
A tip for fluffing these artificial branches is to work the branches closest to the center pole into the shape of a peacock’s fanned tail to create more depth.
If you’re working with a live tree, you can still fluff a little bit. Also, use large glass ornaments to fill in huge gaps.
Tree Skirt Hack
I love using a heavy linen-style fabric to create folds and layers, so it feels more rustic but still light and beautiful.I like using painter’s drop-cloth because it’s a heavy-duty canvas fabric. However, sometimes this material can look flat and lifeless.
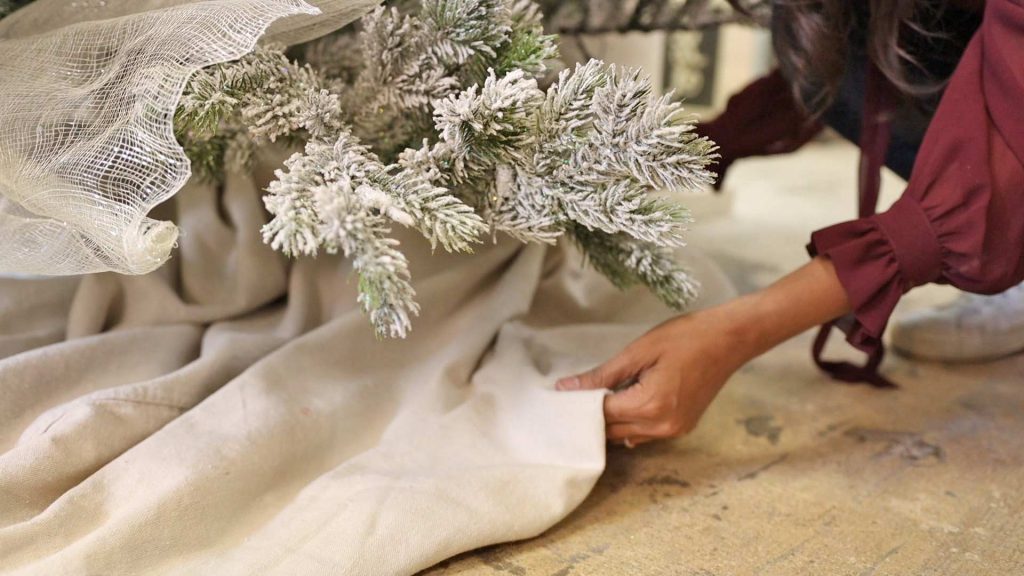
To bulk up the canvas, linen, or any natural fabric for your tree skirt, I like to stuff wadded-up balls of paper underneath it to add dimension.
How To Style Your Rustic Farmhouse Tree With Ribbon
I like to use a mix of at least 2–3 ribbons, depending on the tree’s size, to add a bit of contrast in color and texture.
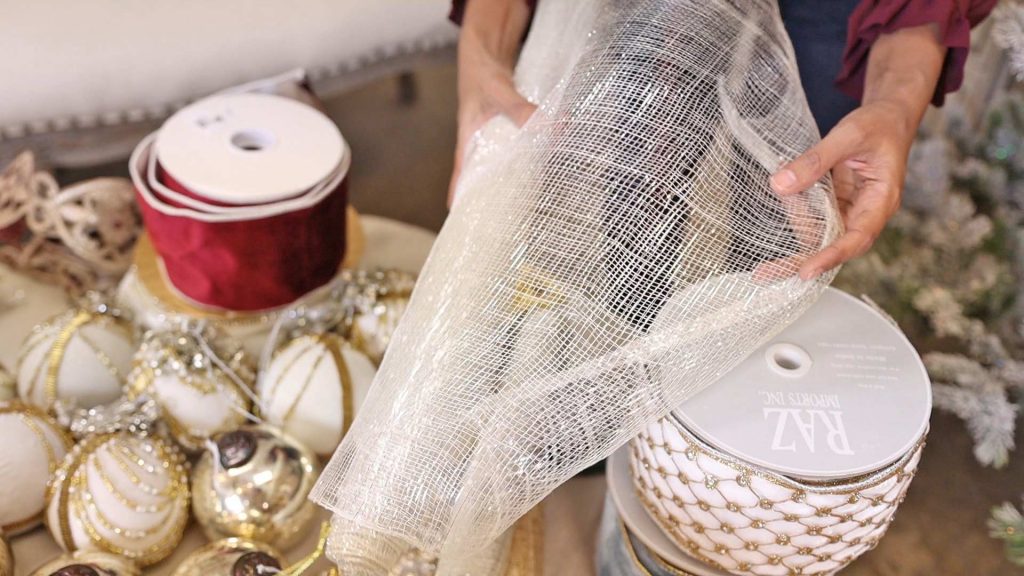
My must-have ribbon for styling a Farmhouse Christmas tree is this long, ultra-wide, mesh-wired ribbon. The wires give it a beautiful structure and drape to it for the elevated-designer tree look that I’m going for.
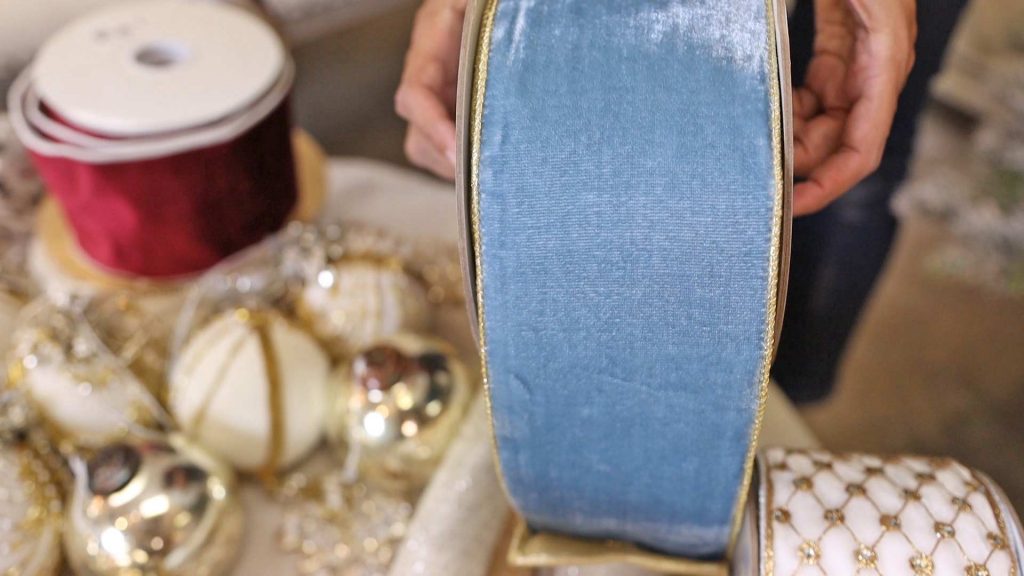
The next ribbon I’m using adds a pop of color to the tree. This year, I’m working with a blue velvet ribbon with gold on one side, for the bit of glam that I love.
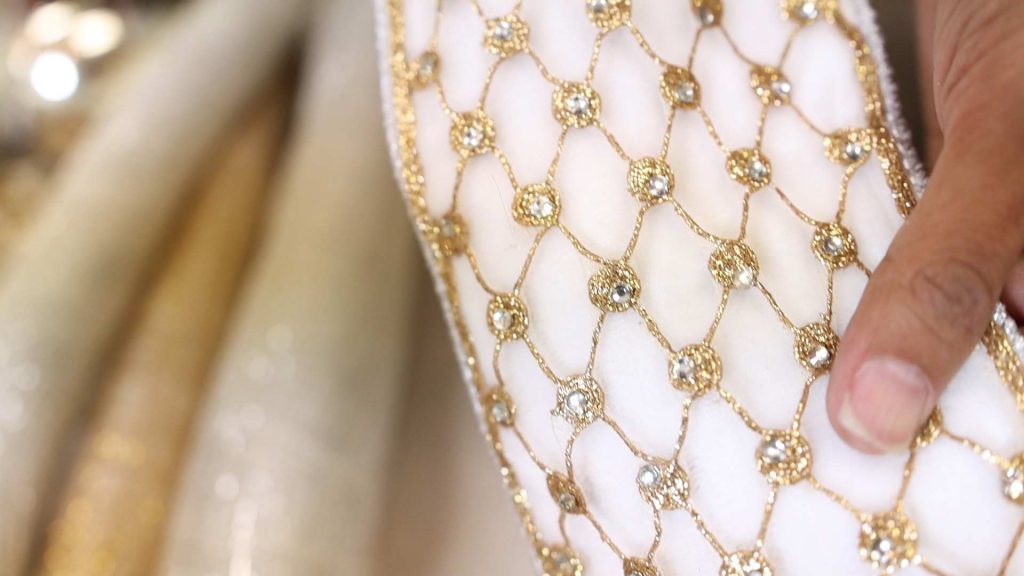
The last ribbon style is all glam. You can choose something embroidered, patterned with jewels, or flecks of glitter. If you’re not into glam, you can always opt for a classic plaid ribbon to embrace farmhouse Christmas decor.
No matter what color palette you’re working with, this ribbon formula is fool-proof— mesh, a pop of color, and a ribbon with a punch of glam.
Placing The Ribbon On The Farmhouse Christmas Tree
Starting with the mesh ribbon, I’ll use the branches to hold the ribbon in place through the holes in the mesh. If you’d like, you can also use some florist wire to secure the ribbon in place.
I’m starting at the tip of my Christmas tree and working my way down and around in a diagonal manner. I’m moving down about a foot at a time, gathering the ribbon to make the first loop about 16–18″ long.
Next, I’m using florist wire to wrap that first loop to the tip of a tree branch.
Once that loop is secure, I’m zig-zagging the rest of these loops in a diagonal pattern down the length of the Christmas tree.
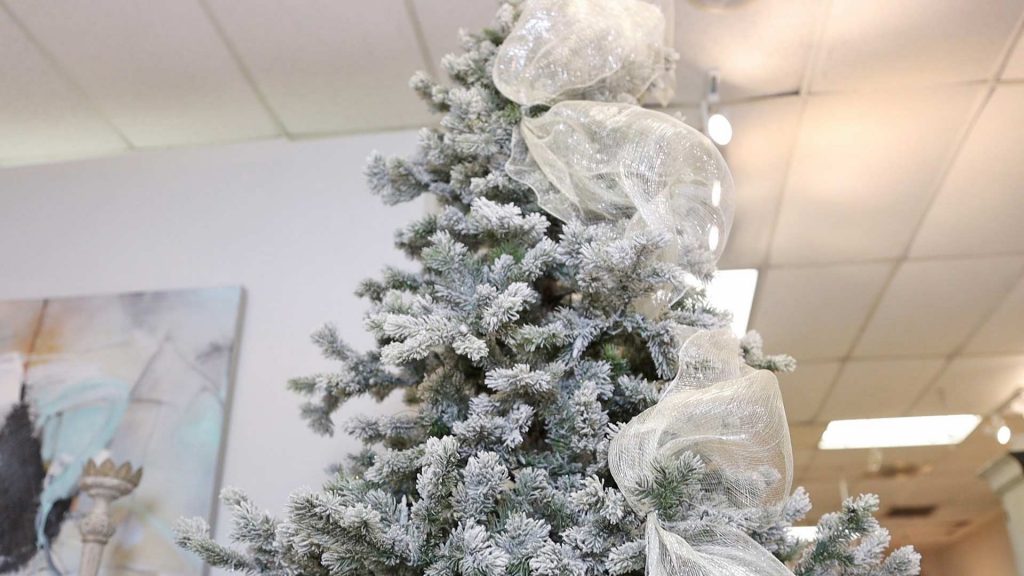
Now that we have one layer down. I’ll move on with the blue velvet ribbon.
I’m going to follow the initial pattern we laid out with the mesh ribbon, but I’ll also wind the ribbon into the tree branches.

Once that section is complete, I’ll do the same thing on the other side of the tree.
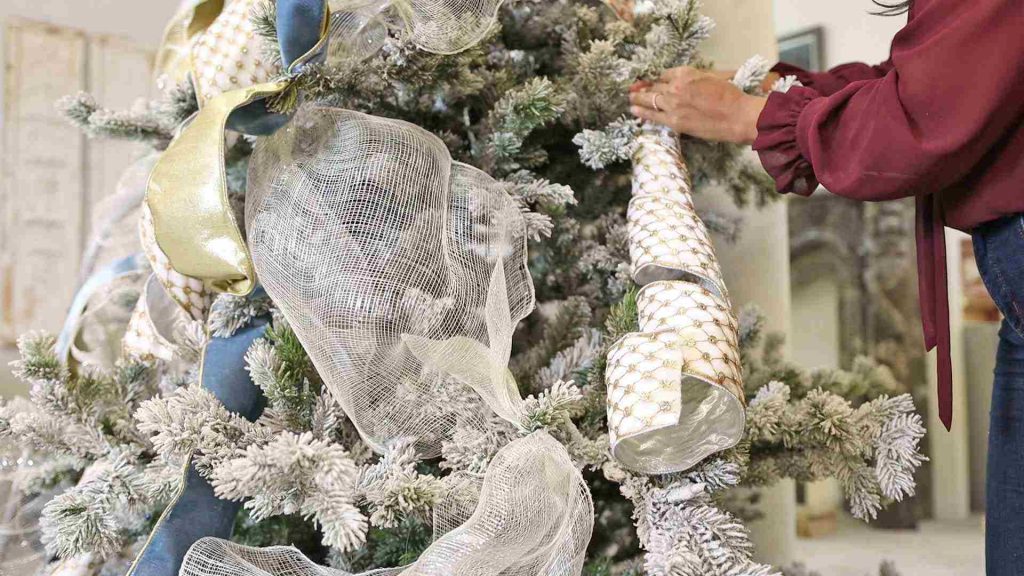
Finally — onto the glammy ribbon.
You can use this coiling method for a bit more interest where I roll the ribbon around to fingers and pinch the top and let it unfurl at the bottom as if it’s hair in a curling iron.

How To Group Your Main Christmas Tree Ornaments

Grouping your ornaments helps to create a balanced look to your styling. This is my trick to making sense of all of the different styles I have collected over the years.
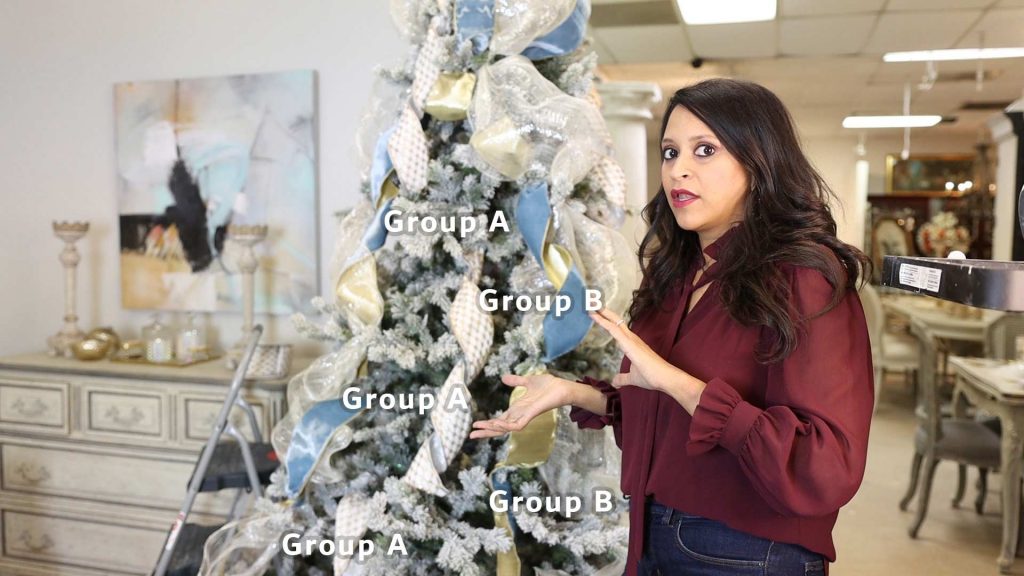
My goal is to create repetitive groups of approximately 3-4 ornaments in each group.
How many groups you’ll create will depend on the different styles of ornaments you have.
For my tree, I have seven styles or ornaments, so I’ll have two groups. Group A and Group B. One group has three ornaments, and one group has 4.
If you have 10 or more ornament styles, try to create small groups of three or four until you create enough groups to assort all of your ornaments.
When creating these groups, I pair ornaments that compliment each other.
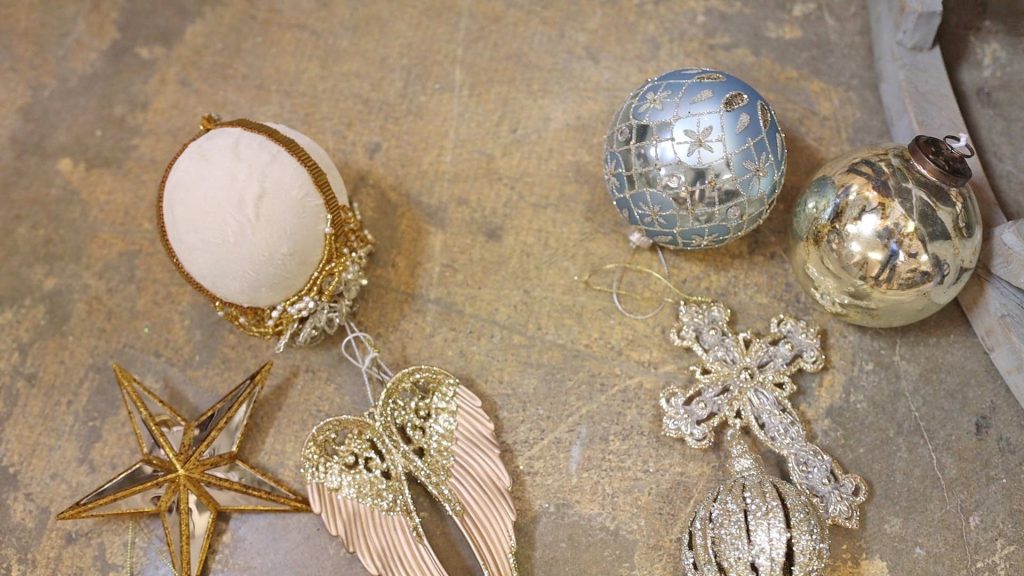
Once I’ve chosen the groups. I’ll start placing them into the empty pockets of my farmhouse Christmas tree in between the ribbons, zig-zagging the placements as I go.
We’re basically arranging these ornament groups to create a “Z” shape in alternating groups.
Add The Unique Christmas Tree Ornaments and Embellishments To Cover the Gaps
I know what you’re thinking, “But there are only three or four ornaments in your groups, Amitha. How on Earth are you going to fill all of this in?”
Don’t worry about that.
Now that we’ve placed our main ornaments on the tree, adding the unique filler ornaments is a breeze. It’s an easy way to fill up spaces while having the overall design look balanced, thanks to the grouping technique.

Another one of my favorite farmhouse Christmas decorations is to use floral stems. I’m using some glittery gold stems to match my tree, but you can play with more rustic, natural elements like pine cones and sprigs if you’d like.


Classic Elegance With A Christmas Tree Topper

The purpose of tree toppers is to add height and symmetry to your design. The most common tree toppers are stars, angles, and bows, which can come in a wide range of different materials.
This year, I’m using a beautiful antique-styled crown with brassy gold and crystal details for a bold statement.
To place it, I’m just using my floral wire to secure it to the top of the tree, and I’m adding a few of my floral stems to create more volume.
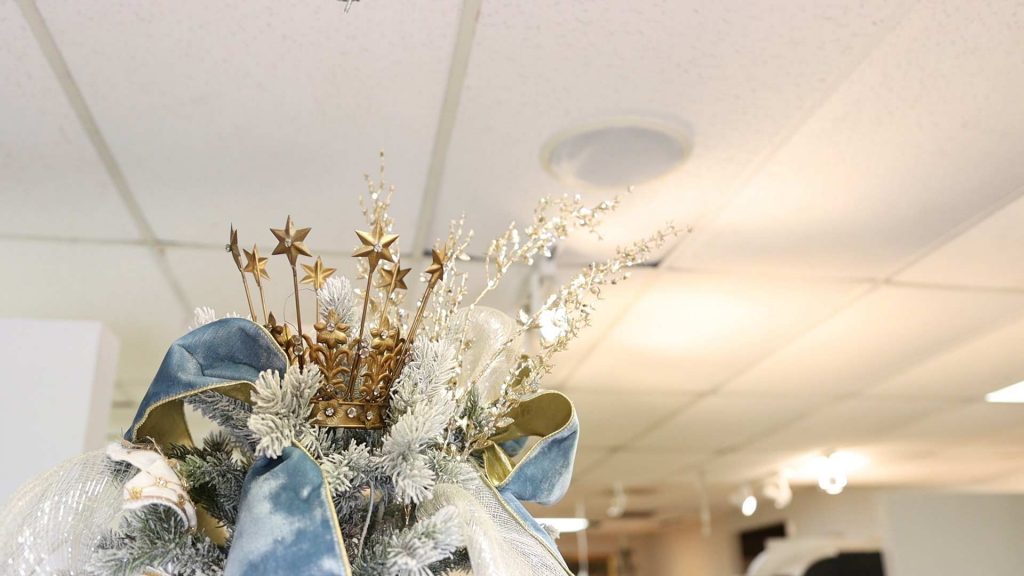
When you’re doing this at home, make sure your topper’s weight isn’t changing the tree’s center of gravity, causing it to bend or become off balance. Don’t be afraid to secure the topper in with wire, like I did to make sure it’s not going anywhere.
To Wrap Up: Farmhouse Christmas Tree Styling
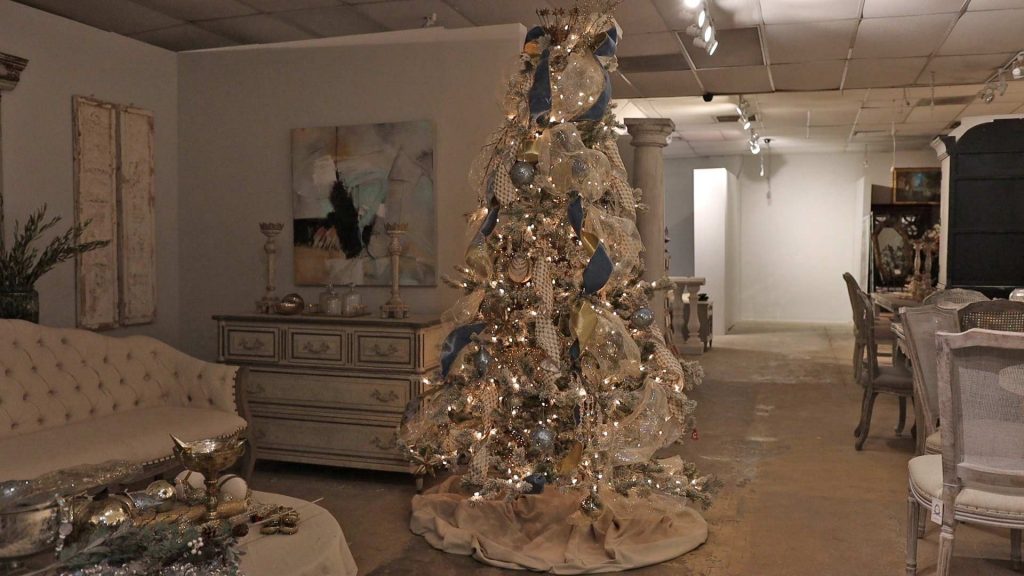
You can implement as many or as little of these techniques I demonstrated today into your home, but I hope you learned a few techniques to elevate your farmhouse Christmas decor styling repertoire.
If you recreate this look, be sure to tag me on Instagram and Facebook. I always love seeing what you create.
Love all of the decor in this week’s blog? Many of these pieces can be found at Village Antiques in Houston, TX. Open Tuesday – Saturday, 10 am to 5 pm, stop on by! Or feel free to give us a call at 713-468-3931 if you have any questions.
Make sure you don’t miss another design newsletter, sign up for your newsletter on this page’s top right.
Until the next time we meet, keep making your home amazing with your design gifts!

Secret Tool Revealed
High-priced interior decorators desperately want this hidden: YOU can transform your home into a gorgeous dwelling—all by yourself—and save thousands. All you need is a few dollars’ worth of material. Access this amazing secret RIGHT NOW, and revitalize your home...in just a few hours.


