Amitha's Blog
The one mistake that’s sabotaging your tree
And just like that, 4 pounds later, Thanksgiving is over!
I bet I can guess what you’ll be doing the next few days…getting your tree or trees up!
I’d love for you to stop by our free how-to demonstration this Saturday at Village Antiques because once you have my tree decorating system down – you’ll embrace the idea of multiple trees in your home! I’ll tell you how to sign up at the end.
Many of you have already shared your gorgeous tree photos with us which we love! Keep ‘em coming!
But many of you also share your frustrations with us as well – which we hear!
So, let’s take it step-by-step to help you create a gorgeous tree this week.
First step, let’s get what you need.
I’m sharing my list of must-have supplies and decor with you. All of it. No secrets. Everything.
Getting the right supplies is more than half the work.
Step 1: The tools
I always keep on hand wire cutters and florist wire. These are far better than those ornament hooks. You can get these at your favorite crafts store like Michaels or Hobby Lobby.

Michaels
Get started by getting these supplies today.
Step 2: The tree
Your tree – silly I know but there are a few steps here. Every time I pull out my trees, I’ll admit they look pretty sad, out of style and dated.
Before I even jump into ornaments, I have to work on my tree. Commit 30 minutes just to this process.
Once you have put it together, start by fluffing out the branches. Trust me, none of them are where they need to be.
Arrange the branches, and then fluff them out.
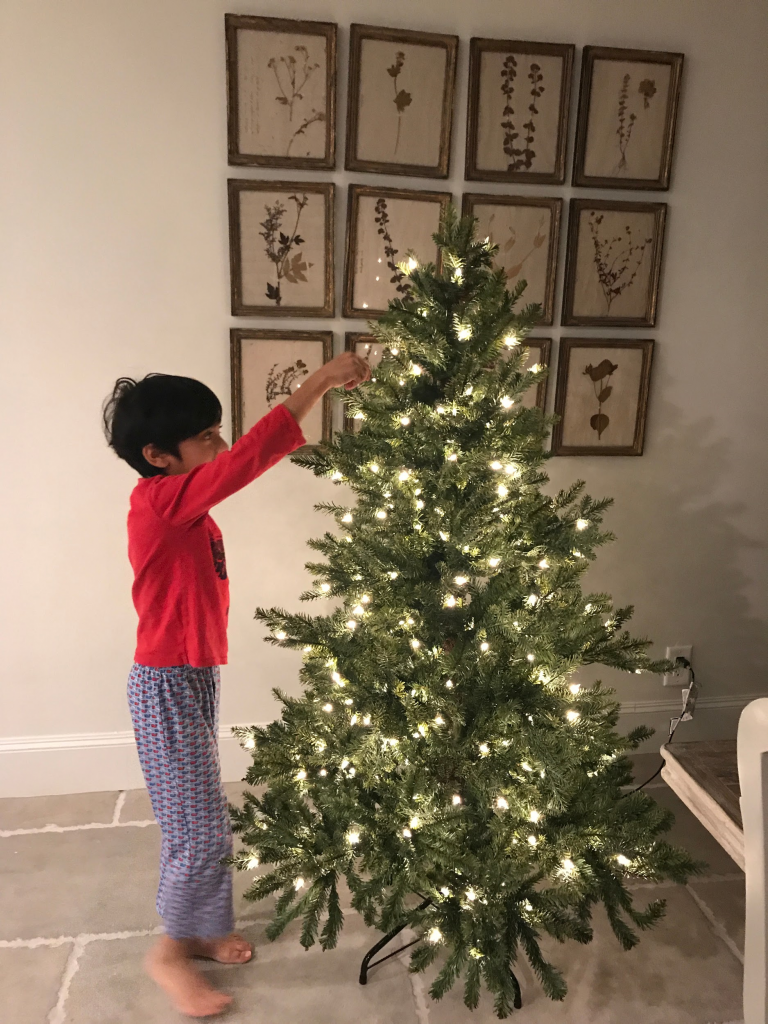
Starting from scratch?
Your main focus should be to get the right size for your room. Not sure? Bring it home and try it before you commit to ornaments.
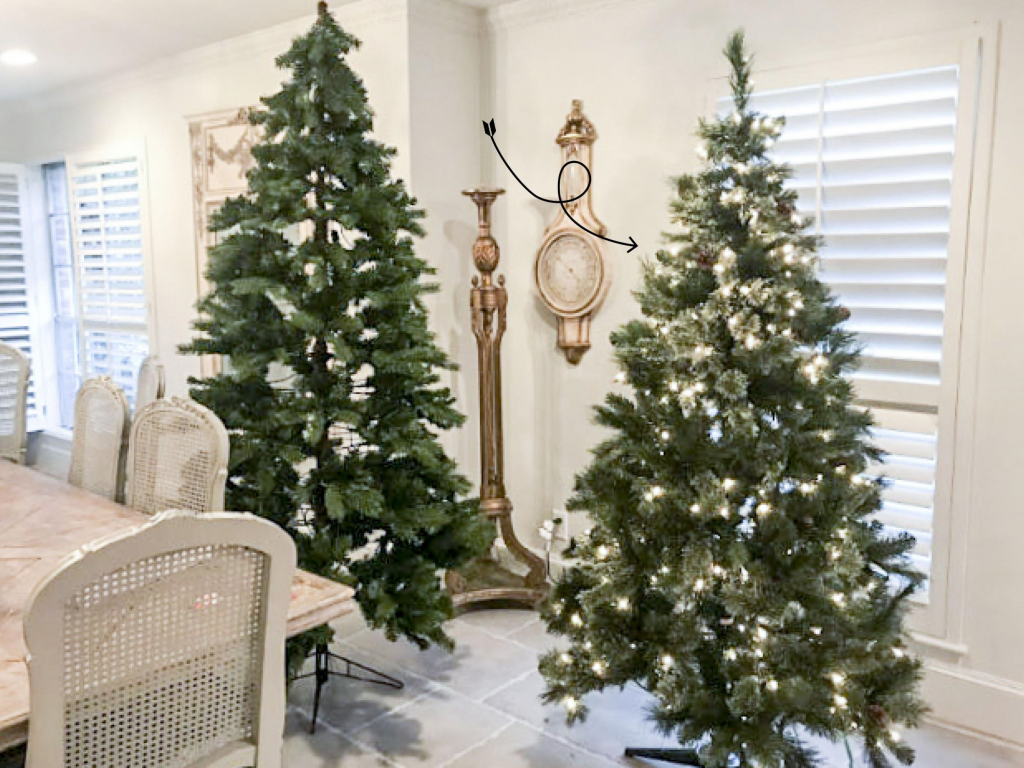
See what I mean here? The tree on the left was just too big for this room, so we opted for the one on the right.
This is also a great time to include any of the new tree trends you might have fallen in love with.
Step 3
Step 3 is the ribbon. Not the ornaments, or the garland, the ribbon.
Decide which ribbon you want on your tree. My suggestion, decide on your color scheme.

You can either match your home decor, or you can go with holiday colors. Both are equally great choices.
In my own home, I have both. I have the classic red, holiday color scheme, and I also have trees that match my decor.
My largest tree completely matches my decor. I choose that scheme for that big tree and that room, so it would be more pleasing and complimentary for years to come.
There’s no wrong or right, whatever inspires you.
My must-haves include these styles
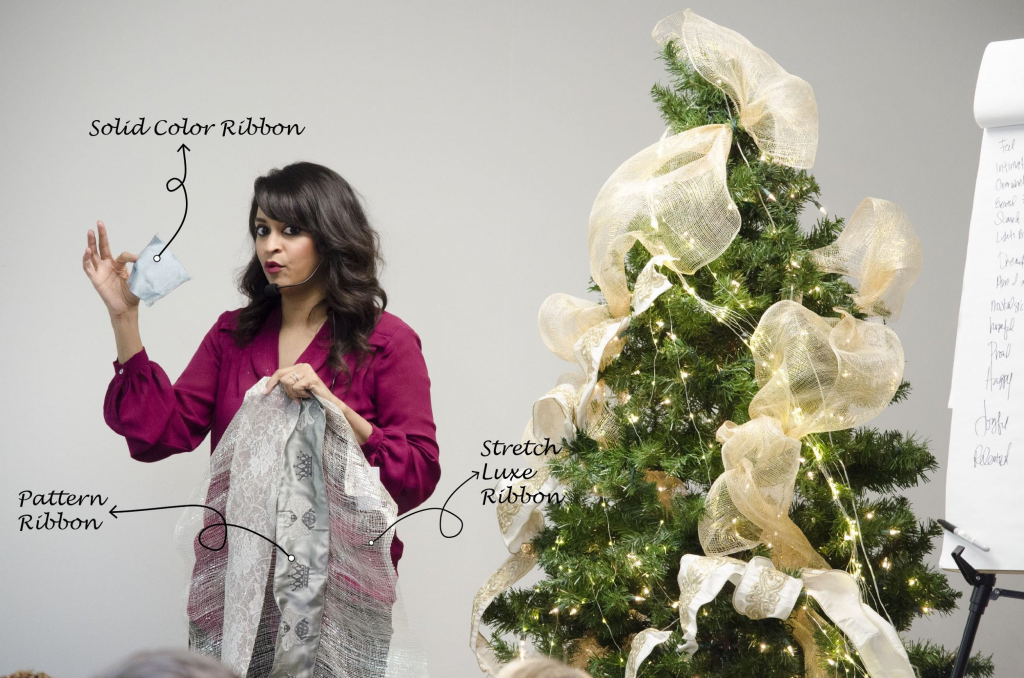
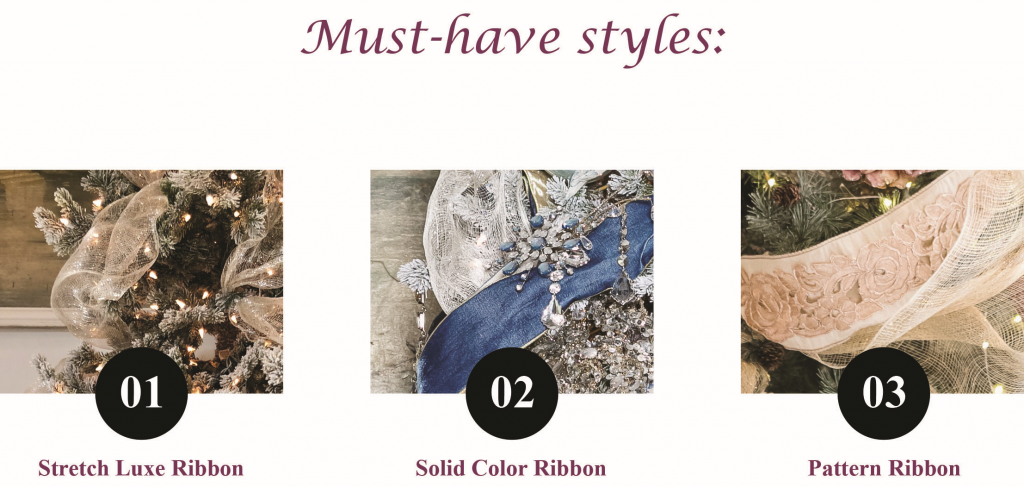
1.Stretch Luxe from Village Antiques in Gold or Silver
2.Solid Color Ribbon
3.Pattern Ribbon
I typically have 2-3 sizes ranging from 18” wide to 2” wide.
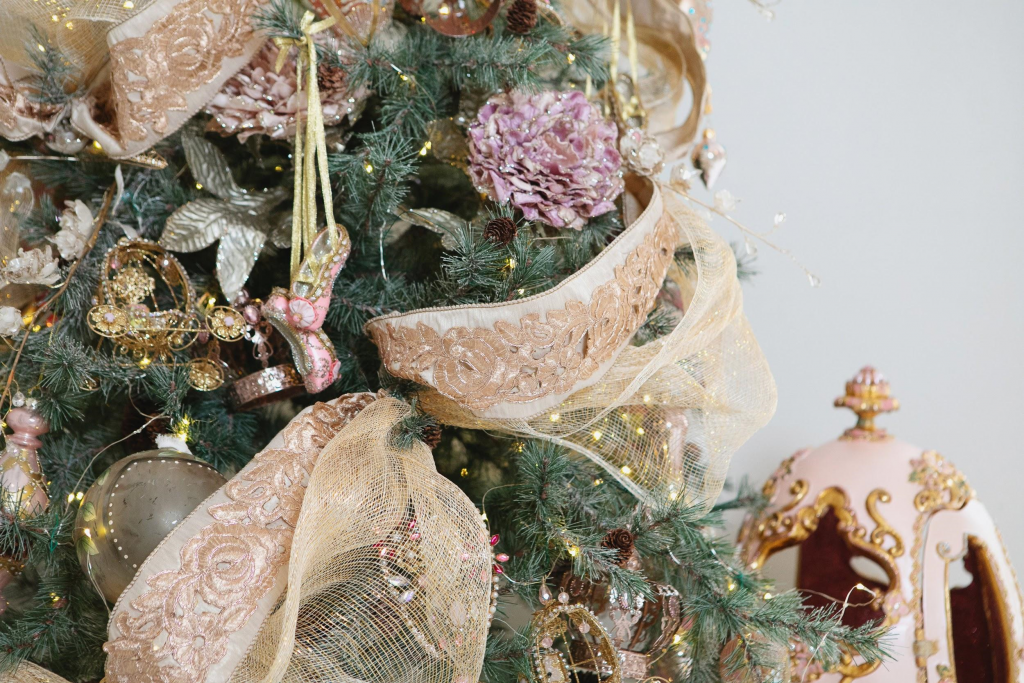
When you come to our workshop on Saturday, I’ll show you 3 ways to arrange the ribbon. I’ll tell you how to register at the bottom of this blog.
Step 4 Ornaments
This is probably the biggest mistake I see when people ask me for tree decorating advice.
One size ornament all throughout. Boring!
Mix it up!
I suggest 3-5 sizes of ornaments of all sizes and shapes.
Here’s my guide of what ornament styles you should include?
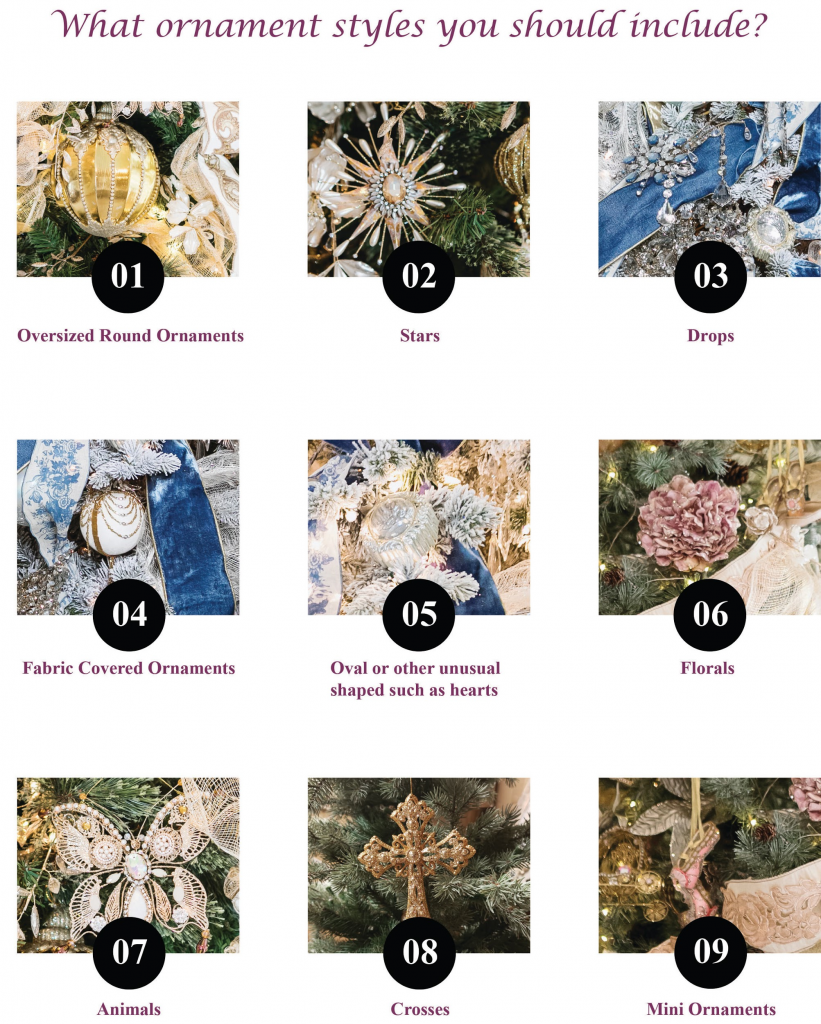
Starting to make sense?
I know this sounds crazy but this is how I create the gorgeous trees our dear clients at Village Antiques LOVE.
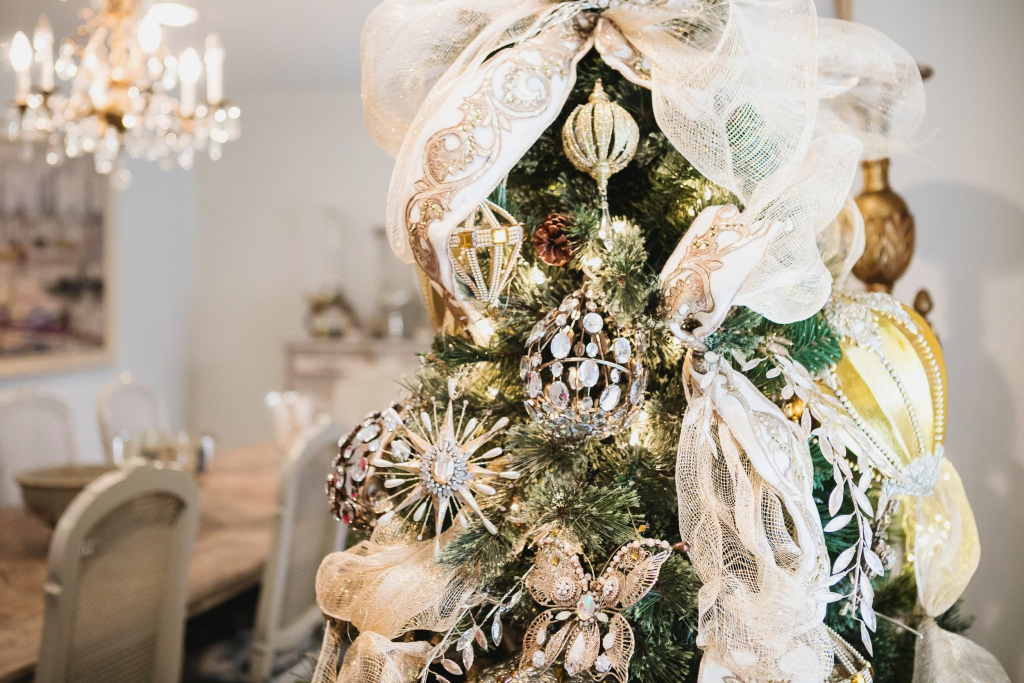
Show up this Saturday, and I’ll show you exactly how to arrange the ornaments.
We’re not done yet. Come on, steps 1 and 2 were super simple!
Yes, keep going.
Step 5
The fillers, this is one of my must-have secret ingredients to a gorgeous tree. It’s what you’ve been missing all along.
If you do nothing this year, simply add 5-7 of these.
I call them fillers and stems.
I use 2-3 objects to fill in those big huge gaping holes in the tree that no amount of ribbon, fluffing or ornaments will cover.
My sister lovingly tells me to add these into my missing spots of hair!
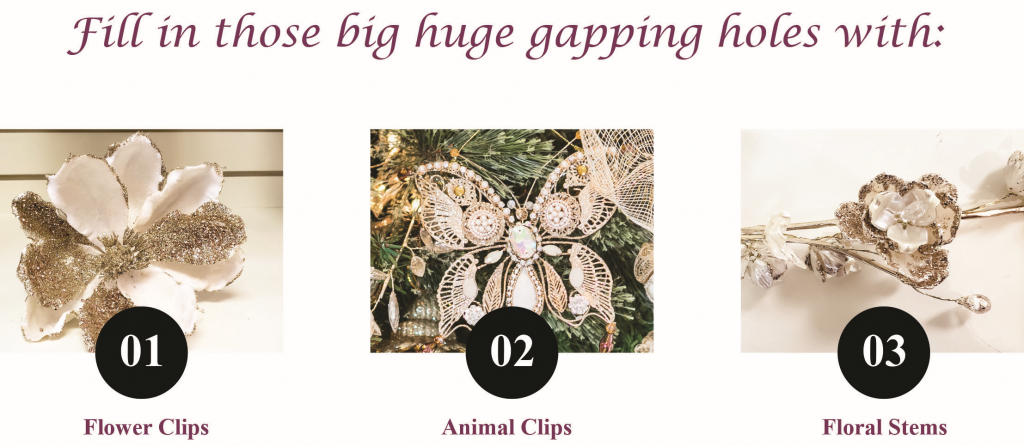
Once you’ve gotten to this part, this is a great time for a coffee or champagne break! Stand back and see where you need to fill in. Where are the big holes?

And then start filling in with these fillers.

On a 6’ tall or taller tree, I typically add 12-16 of these over all.
Before you panic!
They are not all the same, I typically get 3-4 styles with 4-5 of each style.
You don’t have to get them all at once, you can add each year.
Just go with your color scheme and what you love.
Don’t fret too much about “will it match?”
Most of us love what we love, so you will end up selecting things that will look beautiful with your tree. Just be sure to 3-5 of any particular style so you have consistency on your tree.
Step 6 – The top and bottom
Ahh, the topper – always a stumper. I’ll be honest, it’s not easy to find an amazing topper. If you find one, go for the splurge – it is absolutely worth it.
We had these at Village Antiques last year, I splurged and got it this for my own tree, it was too pretty to pass up.

Other years, I haven’t been able to find anything for my trees.
So I came up with a creative solution.
Make your own.
Yup. I’ll show you how on Saturday.
In the meantime, here’s the idea.

And last but not least, your tree skirts.
You will laugh if I tell you what I use. I use these everywhere, it’s one of my favorite must-haves all year round.
Dropcloth.
Yes, shocking but so, so gorgeous – and works for so many uses.
As a skirt it looks like beautiful, puddled Belgian linen.
I have them under every single tree.
It’s easy and doesn’t take away from the beauty of the tree while giving your room a cozy, cuddle up earthy feeling.


So, is your tree ready dear friend? Use this guide to follow along and get your tree done today!
As promised, here is a link for you to register to attend our free, complimentary demonstration on how I create my trees. I would love to see you there THIS Saturday morning.
Click to Register here for our free, complimentary how-to create a designer tree demo.
Everything you see comes from my absolute favorite shop, Village Antiques. Stop in this week to pick your holiday decor.
With Holiday Cheer, your friend,
Amitha

Secret Tool Revealed
High-priced interior decorators desperately want this hidden: YOU can transform your home into a gorgeous dwelling—all by yourself—and save thousands. All you need is a few dollars’ worth of material. Access this amazing secret RIGHT NOW, and revitalize your home...in just a few hours.


